ℹ️ Audits is an upgraded feature available for Business and Enterprise Customers.
In this article:
Enabling Audits
To start using Audits, ensure you have enabled them in Settings.
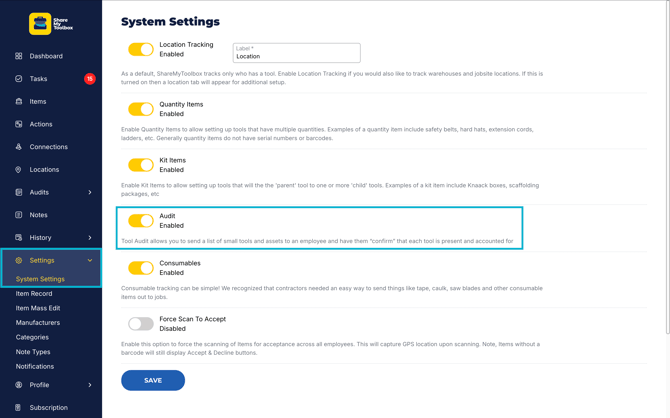
- Click the Settings menu
- Toggle Audit to Enabled
- Click SAVE
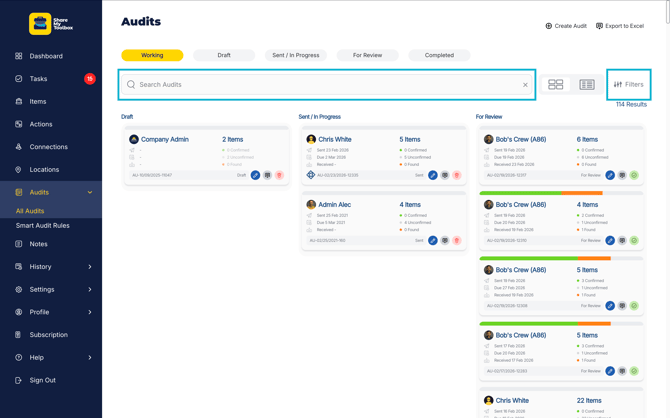
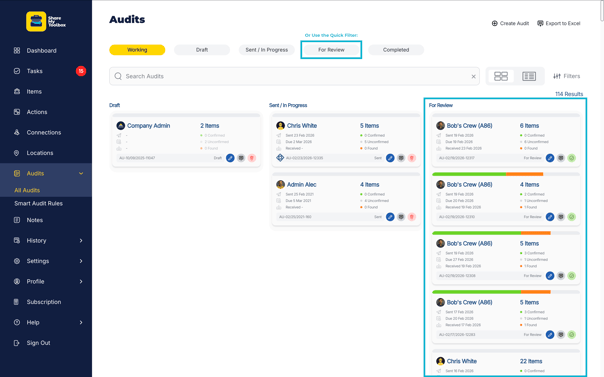
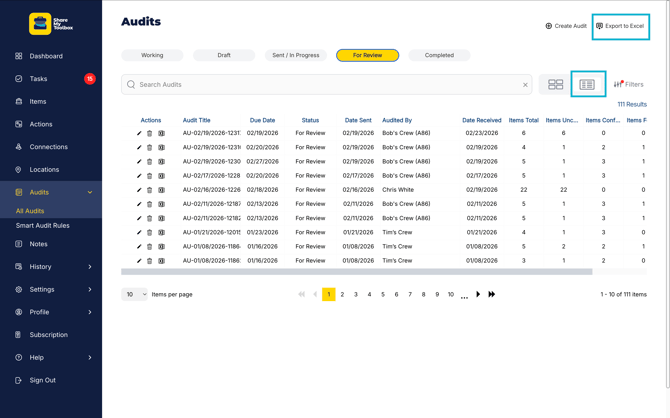
Once enabled, you’ll see Audits in the Menu bar. Toggle between Card view and Grid view using the buttons to right right of the search bar. You can quickly filter between Audits with different status's by using the buttons above the search bar.
Create New Audit
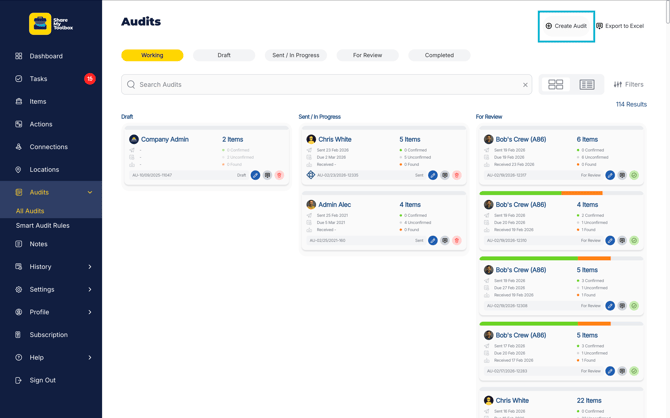
- Click +Create Audit button
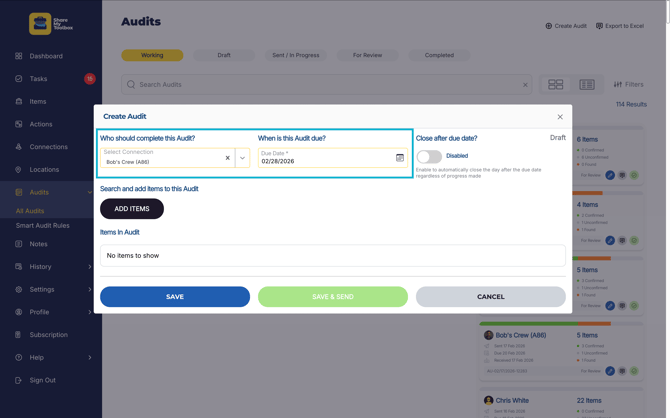
- Fill out Who should complete this Audit (a Connection)
- Fill out the When is this Audit due (when you expect to have the Audit completed)
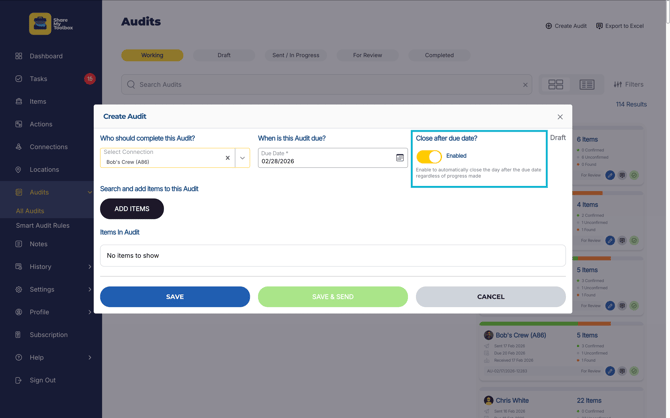
- Close after due date is toggled off by default. Turn this on to have the Audit automatically complete the day following the due date. Whatever progress has been made will be closed out and submitted for Review.
Tip: You may want to have a foreman or supervisor audit another user’s tools. In this case, fill out Who should complete this Audit with the foreman or supervisor’s name, and when selecting the Items in the next section, select Items assigned to other people in the crew.
Next, you’ll search for and select the Items to include in the Audit.
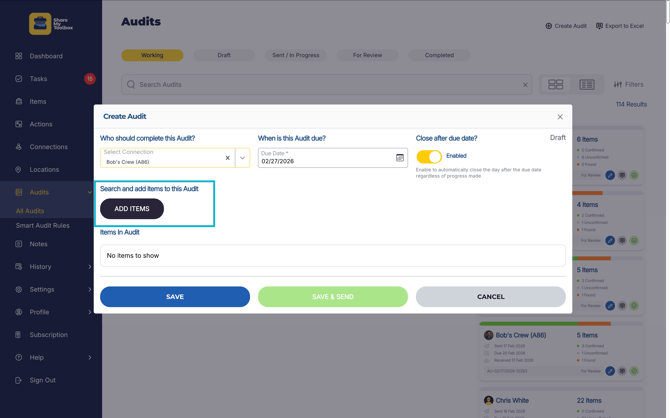
- Click ADD ITEMS
You can use both the Search and Filter options in the familiar Item grid view.
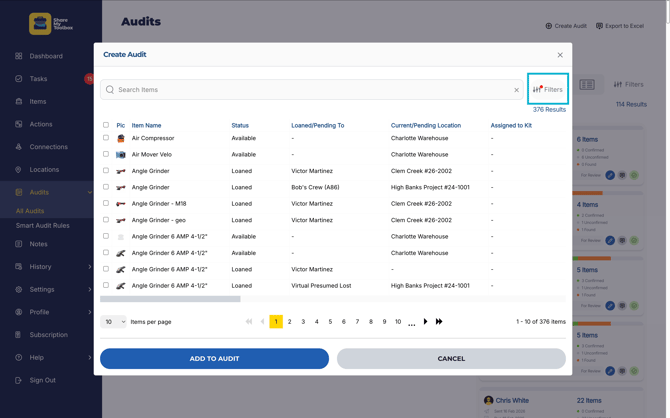
- To use Filters, click on the Filters button
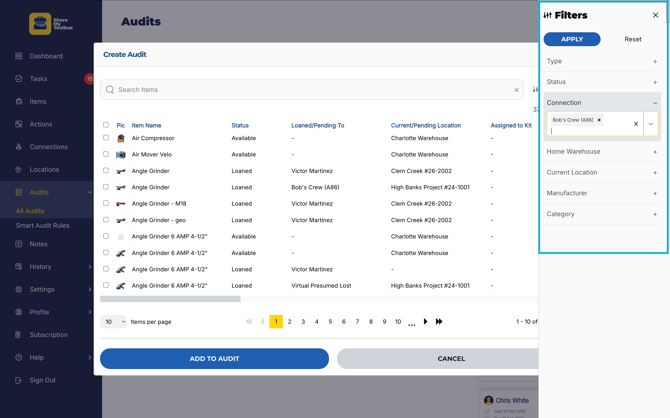
- Select all of the Filters you wish to use, including Items by:
- Type
- Status
- Connection
- Home Warehouse
- Current Location
- Manufacturer
- Category
- Click APPLY
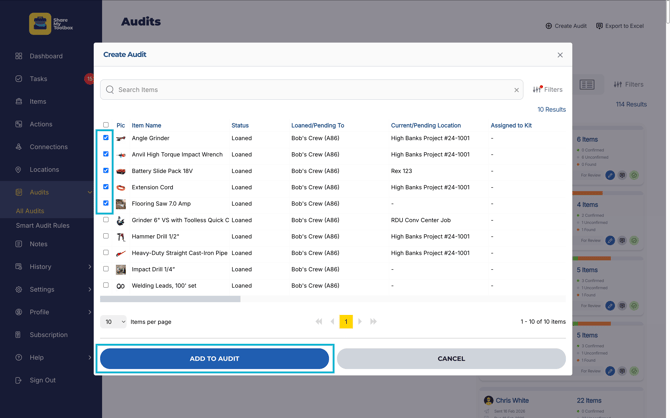
- Add Items to the Audit by selecting the check box for each Item
- Click ADD TO AUDIT
Tip: You can perform multiple Searches and Filters to find all the Items you need, and simply click ADD TO AUDIT.
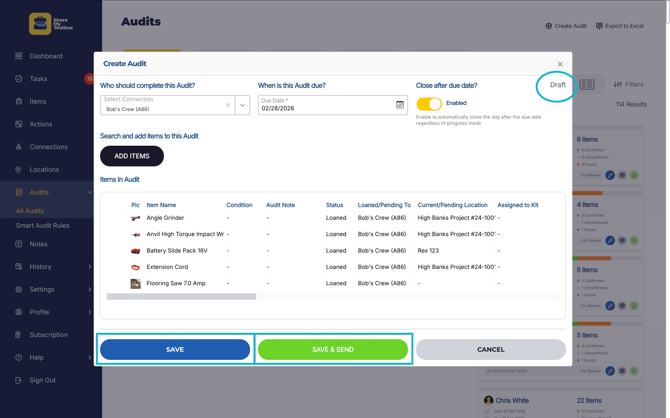
- Click SAVE if you wish to save your progress and come back later
- Click SAVE & SEND to finalize your Audit selection and send to the field user’s mobile app
Conduct Field Audit: Mobile
Conducting an audit in the field using the ShareMyToolbox mobile app is simple. When an Admin sends a request for an Audit, you’ll see it right on top of your Home page Dashboard, and also on home screen Widgets.
See also Tutorials above.
Note: Audits can be assigned to users with a log-in, including Admin, Employee, and View Only Connections. Audits are not available for Virtual Connections.
Note: You may be completing an Audit for tools assigned to someone else, but the Admin sent the Audit to you to complete. Often this is the case if you’re the foreman or supervisor or based on your internal procedures.
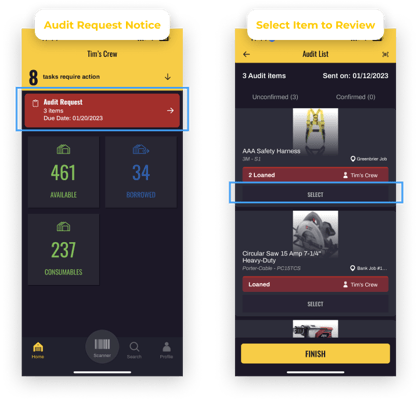
- Tap the red Audit Request notification
- Tap SELECT on each Item at a time to start the Audit for that Item

Items Not Barcoded or Quantity Items
- Tap the confirm selection if you are able to locate the Item
- If a Quantity Item, verify how many you have
- Select the Condition the Item is currently in
- Add any Notes, such as notation of damage, etc
- Tap Save
Barcoded Items
- Tap the Barcode icon if you are able to locate the Item
- Scan the Item’s asset tag to confirm a match
- Select the Condition the Item is currently in
- Add any Notes, such as notation of damage, etc
- Tap Save
Once all Items have been addressed, tap FINISH to send the report back to the Admin.

If you cannot locate any Items, you will receive a message that you have unconfirmed Items in the audit. Tap SUBMIT if ready to complete the Audit, or GO BACK if you wish to still locate those Items.
That’s it! You’re done with the Audit.
Review Completed Audit
Once the field Audit is complete, you will see the status change to For Reviewi n the Audits section of the Menu.
- Click on the Audit Card or Edit icon to review the Audit
Audit Details
Here, you'll see the details of the Audit:
- Audit Number (system generated autimatically)
- Connection Audit is Assigned
- Audit Completed Score
- This score is calculated based on the number of Items assigned to audit, and how many of those Items were confirmed.
- Dates: Sent, Due Date, and Received Dates
- Audit Item Count Results: Confirmed, Unconfirmed, Found
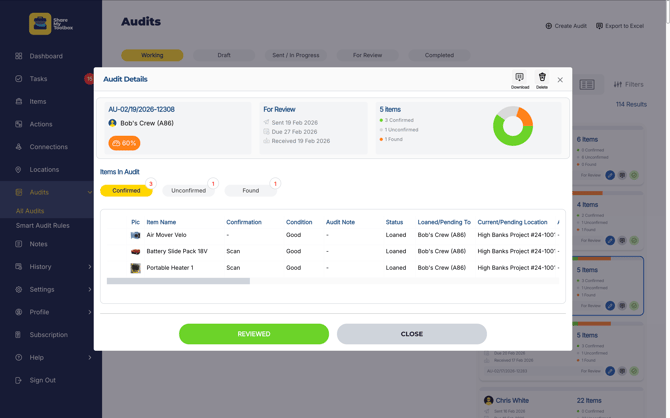
Items in Audit
You can view the Audit details in the Unconfirmed, Confirmed, and Found tabs

- Confirmed displays the items in the Audit that were successfully found.
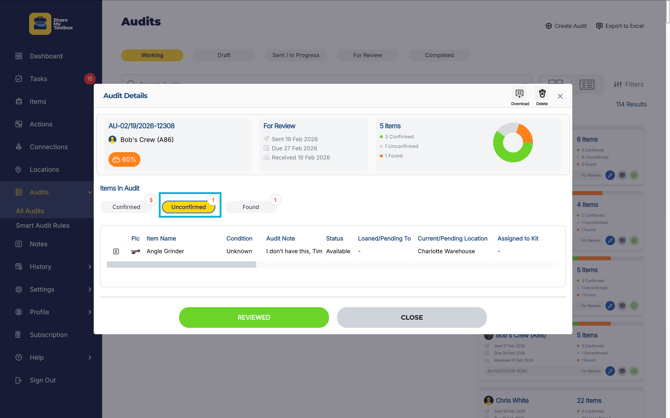
- Unconfirmed indicates the Items in the Audit that were not found.
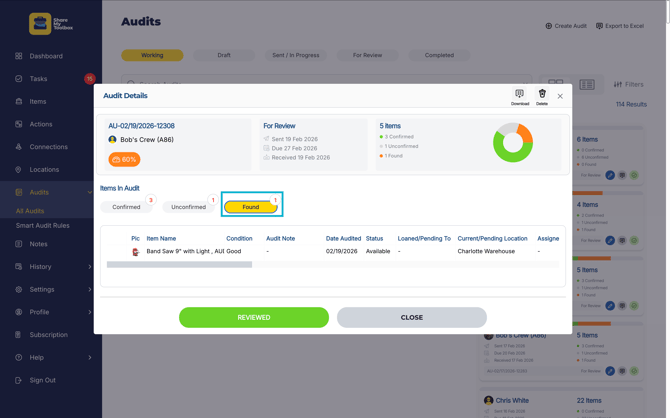
- The Found tab reports Items that were scanned, but not included in the original Audit. You may want to loan these Items to the Employee being audited, if they weren't already assigned.
Tip:
You can click directly on the Item from the Unconfirmed, Confirmed, and Found tabs to Loan/Return/Transfer an Item to the appropriate Connection and Location if changes need to be made.- Once reviewed, simply click REVIEWED to complete the Audit
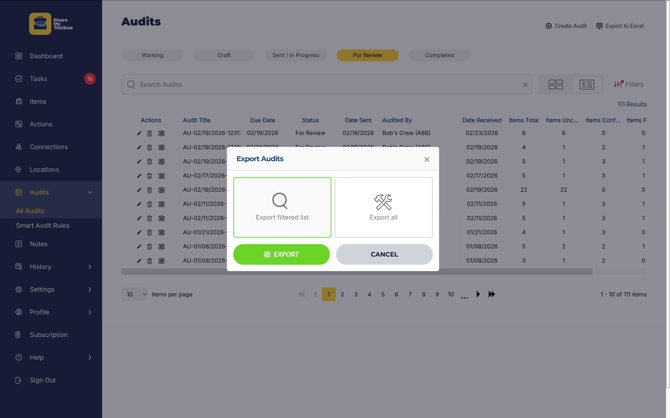
Export Audits for Reporting
Audits can be exported to Excel for further analysis or to import into other internal systems.
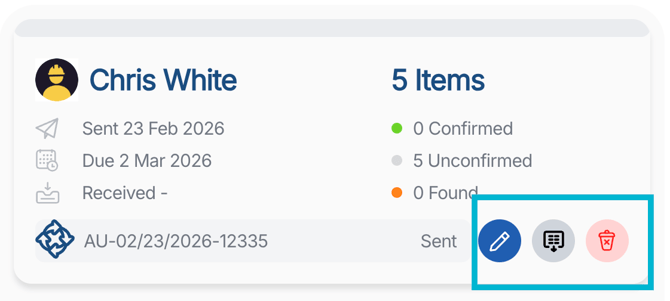
To export an individual Audit, search for the Audit you want, then click the Excel button on the Audit’s record.
To export many Audits, use the Search and Filter options to find the list of Audits you wish to export. Tap the Export to Excel button at the top of the screen.
Delete Audits
Individual Audits can be deleted by tapping the trash icon on the audit record.

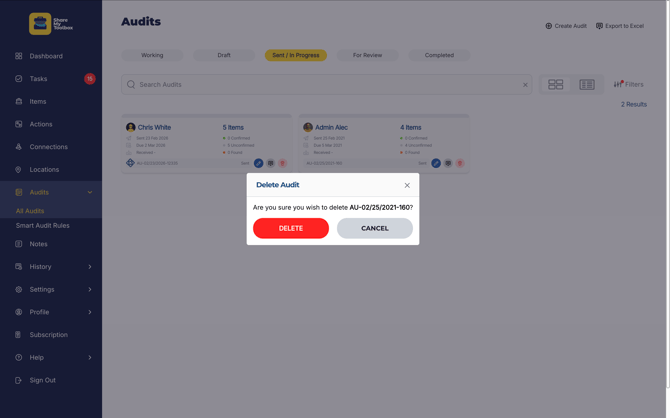
- Click DELETE to permanently delete the Audit record or CANCEL to go back