Kit Management
Kits is a special type of item that can act as a "parent" to other items. Kits can be used for tracking Knaack boxes, welding kits, scaffolding and other items, and allow other items to be transferred into the Kit and then loaned out in a group.
ℹ️ Kit management is an upgraded feature available for Business and Enterprise Customers.
In this article:
Enabling Kits
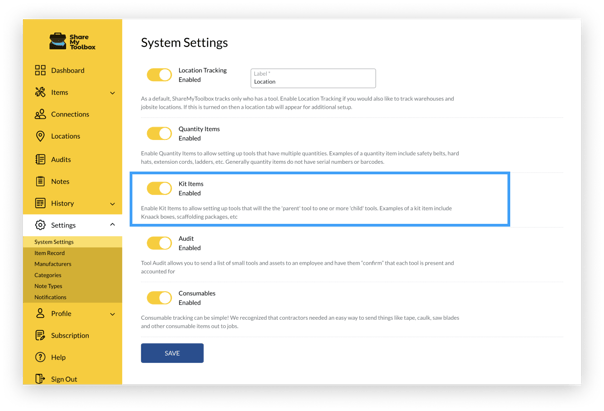
To start using the Kits feature, in the Web Portal go to Settings menu to toggle on Kit Items.
Setting up a Kit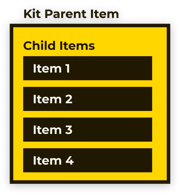
Understanding the Kit Database Structure
A Kit is simply a Parent Item in the database, and any Items assigned to the Kit are Child Items in the database. This means that when you Loan a Kit, all of the Items assigned to the Kit move with it.
Creating a Parent Kit Item
Setting up a Kit is easy.
- Simply go to the Items menu
- Click Add Item like you would for adding any other Item
- Select Type as Kit
- Give the Kit an Item Name
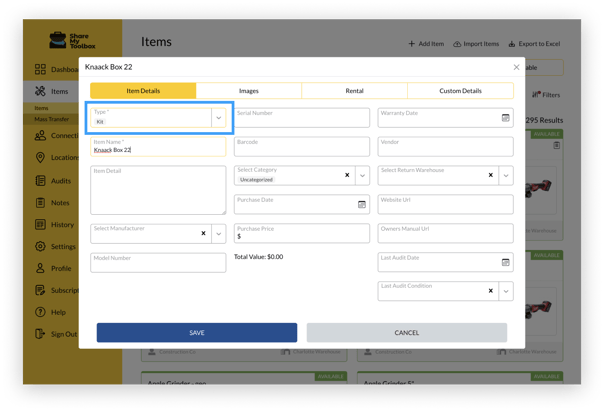
Note: The only fields required are Type and Item Name. But you can fill out a number of details if you wish, including a barcode.
Tip: A kit can contain a "Standard" Item and/or a "Quantity" Item. However, a kit cannot contain another kit. (You can't kit a kit!) So setup the items that are going to be put into a kit as either Standard or Quantity items and then assign them to a kit using the manage kit function.
Adding Items to a Kit
There are two ways to add Items to your kit.
- From the Kit Record
- From an Item Record
Add from the Kit Record
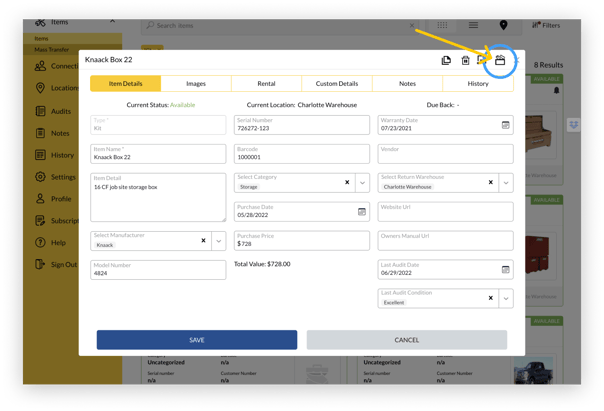
To add Items to the Kit, simply bring up the Kit record
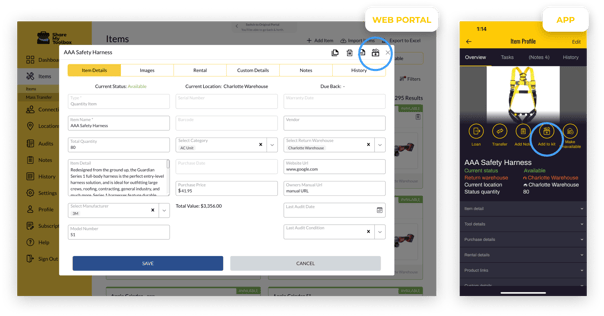
- Click on the Manage Kit icon on the top right.
Next:
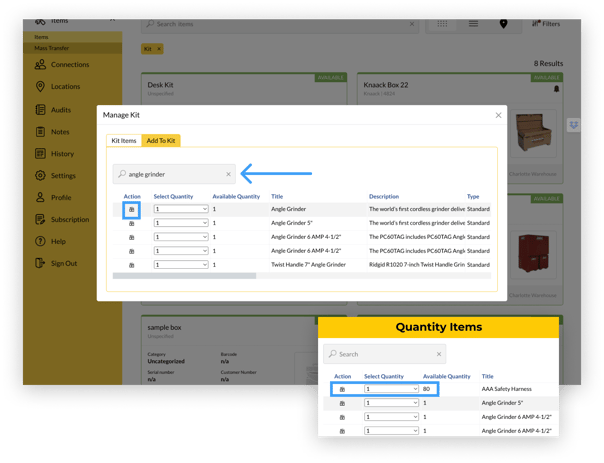
- Search available Items. Type in the name, description or even barcode number to find the Item you want to add to the Kit.
- Click on Add to Kit icon.
You can even add Quantity Items to your Kit. Just select the quantity, then click Add to Kit.
Note: The Kit and the Items must be in the same Status.
For example, if the Kit is 'Available' then you can only place Items that are 'Available' from the same Location. Also, both can be in Loaned Status. As long as the Kit and Items are the same Location and Status, the two can be paired up. Kits and Kitted Items must match in "Return Warehouse" field on the item's record.
Add from the Item Record
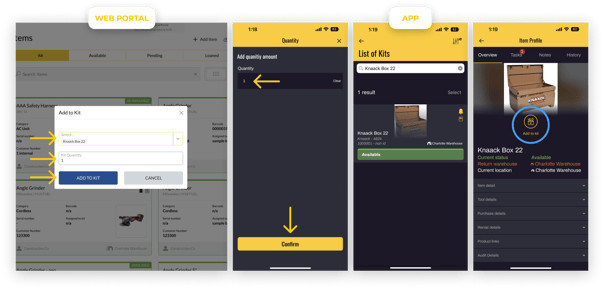
Items can be added to a Kit directly from the Item record.
- Search for the Item you want to add
- In the Item record, click the Add to Kit icon
Next, select:
- Quantity
- Kit to add the Item to
- Click or tap Add to Kit
Editing a Kit
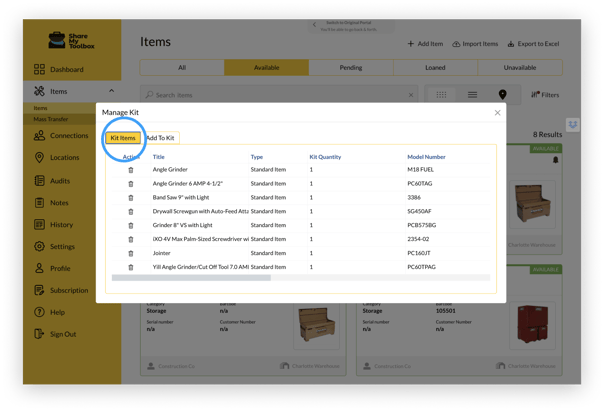
To Edit a Kit, simply search for the Kit from the Items menu.
Click on the Manage Kit icon.

There are two tabs:
Kit Items: All of the Items currently in the Kit. Click on the Trash icon to remove an Item from the Kit.
Add to Kit: Search for Items you wish to add to the Kit.
❓Frequently Asked Questions
▼ Can I create a Kit after the Items have already been loaned?
Yes! Once you create the Kit Item record, simply Loan it the same as the Items. Once the status of both the Kit and the Items you want to add to the Kit are the same, you will be able to add those Items into the Kit.
▼ Can I make a Kit 'Unavailable'?
Yes, but the Items inside the Kit must first be removed using the 'Manage Kit' function.

